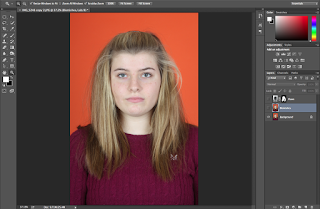
Before -
After Skin Retouching -

After Blemish and Wrinkle Retouching -

The Process Skin Retouching-
1. Select 'Image'
2. Go to 'Mode'
3. Select CMYK
4. Go across to 'Channels'
5. CMD A
6. CMD C
7. Go back to layers
8. Edit
9. CMD ALT Z
10. CMD V
11. ALT K and select the 'Create New Mask' tool
12. Rename the layer 'Flaws'
13. CMD I (or image adjustment invert)
14. Change the mode to 'Soft Light'
15. Create an inverse mask using ALT add layer mask
16. Paint white over the areas of imperfections with an opacity of 50%
The Process Blemish and Wrinkle Retouching -
1. Select the background layer
2. Using CMD J duplicate the layer
3. Select the 'Spot Healing' tool
4. Paint over the imperfections with the brush
Before:
After :
Evaluation :
I am satisfied with the overall appearance of the final image and the techniques used to achieve it. However, if I was to be extremely critical I would say that the skin retouching has made the subjects skin slightly grey. Although, the blemish and wrinkles tool worked extremely well for removing some of the skin imperfections. One disadvantage of the technique is that the background colour is also altered but it is something that can easily be adjusted. Therefore, the techniques are something that I would implement again in the future when editing images in Photoshop.


No comments:
Post a Comment